
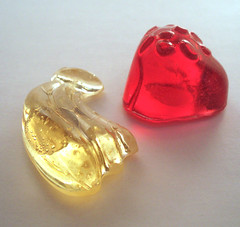
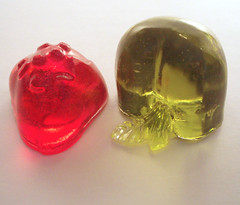

Frosted: The silicone molds I'm using naturally create a frosted finish. It really does look nice; light passing through is diffuse and casts a colorful glow-y shadow.
Glossy: Have a coat of high-gloss glaze on them. Once the glaze is applied and dries, the piece becomes incredibly glossy. It's almost petulant for (fake) fruit to behave so brazenly!
The ultra-powerful magnets are attached via "Goop" craft adhesive. It is a wonderful clear adhesive, but in the right circumstances (when 2 magnets meet at just the right angle and force), the magnets can overpower the adhesive and pop right off. So, I put a word of caution in the magnet listing about this VERY naughty behavior on the behalf of the neo magnets.
These are really fun to make, but from beginning-to-end, it is a laborious and time-intensive process:
1) Condition the molds
2)Warm the resin & catalyst
3)Pour/mix the resin, adding color if desired
4)Pour resin into molds
5) Babysit the molds as long as you can stand it (getting rid of bubbles, placing embeddments, etc.)
6) Wait a couple of hours and pour another layer (if adding embeddments)
7) Repeat # 6
8) Let resin cure overnight, in a covered container to prevent dust and wot-not from getting in
9) Pop pieces out (VERY hard on the hand joints), but extremely satisfying
10)Use dremmel to sand the backs until smooth (uses 2-3 different dremmel bits, goggles, dust mask, enormous mess)
11) If making a pendant, drill hole
12) Treat hole with sealant
13) Add gloss finish if that effect is desired
14) If piece is acceptable, attach findings for jewelry or magnets for, well, magnets
15)If piece is not acceptable, mix a new batch of clear resin and brush on the surface of piece
16) Check again for acceptability in 24 hours
17) Resand pieces if needed (or give the unsatisfactory ones away to unsuspecting family members)
18) Take photos
19) Make super-cute "upcycled" tin containers for presentation
20) List them in the shop!
It really is fun.


2 comments:
Would it be possible to create a custom mold? I wonder if the Crayola molding clay could work? I'd like to do my baby's hand to wear!
Sure! In fact, I have the stuff to make a mold, but I haven't tried it. All you have to do is make an impression in it and let it cure. Not sure about the Crayola brand, though. Let's make a baby hand!
Post a Comment